
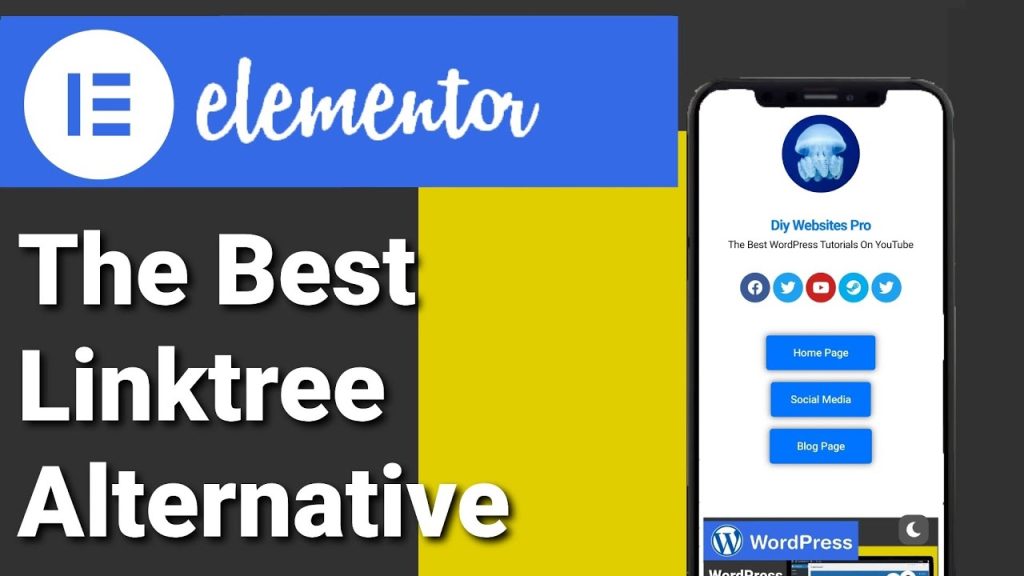
The Best Alternative To Linktree – Build Your Own Elementor Link In Bio
Hi guys in this video I’m going to show you how to build your own Linktree style website. All you need is your own domain and Elementor. At the end you can start using your link in your social media and you’ll save yourself a load of money by not having to sign up for sites like Linktree. Don’t forget to like and subscribe and let’s get into the Tutorials.
Okay guys the first thing you need to do is click on pages on the left hand side. Select add new at the very top. Once your page loads you’re going to have to give it a name and I’m going to call my page not link tree and that’s because it’s not Linktree it’s going to be better. Once you’ve finished typing in name click on edit with Elementor. Now once the page loads the first thing I’m going to do is remove the header and the footer.
On the bottom here and i do that by clicking on the gear icon on the left hand side.
Click on the page layout drop down menu and select Elementor canvas. What I’m also going to do is change the colour of the background I click on the gear icon. Again and this time I go into style on the top row. Now where it says background type click on classic. If you’d like a two colour gradient background click on the gradient button next to classic. You can also add a background image personally i wouldn’t add a background image here.
It can look a bit messy and take a lot of time to make it look right wait until the end of the Tutorials and I’ll show you how to add a background image. Back to changing the background colour. We’re going to click on the box with the red line through it and we’re going to select white. You can select any colour you like from the colour picker. I’m just choosing something that looks a little bit cleaner on the page.
The first thing we see when we click on a Linktree profile is the profile image. That’s what we’re going to add now. Click on the widget home button and scroll to the bottom. Select single and drag in the offer box widget. What we’re going to do next is change our profile image and we simply do that by clicking on the drop down menu. Next to source and click on custom.
Select choose image and once the page loads select your profile picture and click insert media. Now we’re going to change our profile name and you just click in the name box start typing. Now that we’ve added our profile name we’re going to add our profile description. To do that on the left hand side click in biography and start typing your text. You can type in anything you want like this bold statement here.
So at the moment it doesn’t look much like a Linktree profile. To change that we’re going to move our profile picture above our text and we’re going to centre align it to do that under layout. Click on above and click on centre underneath. one thing you certainly can’t do on Linktree is change the size of your profile picture.
To do that click on star at the top of the page and underneath where it says image size. We’re going to drag the slide bar up and as you can see we can make it really small or really big. We can also change the spacing in between our image and our text to do that. Click on the slide bar under gap and start moving it up and down. We’re also able to change the colour of our heading and our text. Select the colour picker and choose which colour you want from the colour palette.
I’m going to choose this colour and I’m going to right click and click copy. now I’m going to paste this colour into the colour picker underneath which will change our text colour. Now the great thing about building your own is you can choose any colour you like for your text and your background. So I’m going to change this to black. Now it is starting to look more like a link tree profile.
To really start refining our page to be used with mobile phones. I’m going to change our responsive mode. To do this select responsive mode at the bottom and select the icon that looks like a mobile phone. At the top of the page I’m now going to start adding our social media icons. You do this by selecting the widget menu icon at the top. Scrolling down the page to social icons. You can also find them by typing in social icons into the search widget box.
Whichever way you find them you’re now going to have to drag and drop them onto your page. You also might be tempted to drop them in the drag widget here section for this type of page. I wouldn’t recommend that and I would drop it directly under the author box and this is so everything stays close together meaning that people visiting your page don’t have to scroll as much. And it saves you time not having to change margins.
To make it look right now that our social icons are on the page. We can edit and add new ones to add more social icons. All we need to do is click add item. If we want to change the image of the icon all we need to do is hover over the image and select icon library. There are 54 different social icons you can choose from plus you can upload your own.
If you’re a gamer and you’ve got a steam account. You can select the icon and click on insert now. You can add as many social media icons as you like and they are customizable. I’m going to add a couple more and then I’m going to show you how to customize your icons. Once all your social media icons have been added you can choose whether you want to use the official colours or what ever you want to match them to your website branding by selecting custom.
It will bring up two colour pickers that will let you change your colours. Next we can change the shape of our social media icons by clicking on shape and selecting circle. We also have the ability to change the alignment of our social media icons. All that’s left to do is click in the link box and enter our account URLs. If we want to edit one of our social icons. all we need to do is click in the box and follow the same procedures.
As we just have our pages definitely get in there now. So what we’re going to add is our buttons. Again we’re going to drop our button widget directly underneath our social media icons. To save time later on I’m only going to create one button. I’m going to style it how I want to. Then I’m going to duplicate it and make any changes necessary. This makes sure that any colours we’re using and fonts stay the same.
The first thing I’m going to do is centre align our button. I’m also going to change the button size to large. Now I’m going to go into the style tab and change the button colour. Once on the style tab select the colour picker and choose which colour you want set for your buttons. I’m going to use the same blue that we use for the header. Now I’m going to add a shadow to our button. To do that click on box shadow and you’re going to need to increase the spread of the shadow.
Now that’s done I’m going to go back into our content page and change the text of our button. All I’m going to call this button is home page. To point your button to where you want it to go. All you need to do is type in the URL into the link box. Now I’m going to duplicate the button so all the settings and fonts are the same. Right click on the pencil on the right hand side and click on duplicate. Now you can add as many buttons as you want to this page.
To change the names and the sizes of the buttons. To make sure they all match when changing the padding size of the button use the one in the style tab. Not the one in the advanced tab as this changes the padding around the words inside the button and not his position on the page. So far I know I haven’t shown you anything that makes your page stand out from a normal Linktree account. I’m going to change that right now.
I’m going to quickly scroll down now through the widgets on the left hand side and I’m looking for the video playlist. Once I’ve found it I’m going to drag and drop it onto our page. To show you how this widget works I’m going to copy and paste one of my video URLs into one of the sample video boxes. The first one I’m going to change is this one here and I’m going to click on the left hand side. The first option where it says link we’re going to paste in our video URL
Now click on get video data. What this will do is get our video thumbnail our title and our timestamp. Now all that’s left to do is finish adding your video URLs.
So what else can we add to make our not Linktree page even better. What about a contact form that our visitors can message us. Within our widgets list scroll down and select form and drag and drop it into our page. This is only available for those with Elementor pro. If you don’t have Elementor pro then don’t worry there is a link in the top of the description.
I’m going to quickly go up and copy and paste our colour for our button and paste it into our button for our form. Like all Elementor widgets you can customize them to look exactly how you want them to.
I’m not going to give a full tutorial on how to use the forms in this Tutorial but if you do want to see one hit the notifications icon. Because there will be one coming soon.
So what else can we add to our film that you can’t with Linktree. We can add spaces to make sure every element sits perfectly on the page.
One thing we can do is quickly go into the desktop view and change the alignments for all our widgets for desktop view.
To do this click on the icon that looks like a monitor along the top row. Now I do know it looks a little bit messy but this is all simply fixed by clicking on each item and centre aligning them in the page. Where needed changing the padding around the buttons. Now you may be one of those people that don’t mind whether someone can see your page on a pc and that’s perfectly fine.
But you still might be surprised how many people view pages like Instagram on their pc. So for an extra five or ten minutes work it’s worth making sure that everyone can view your page properly. So now that we’ve got our page looking roughly how we want it to what else can we do? If we click back onto the mobile icon on the top of the page. We could actually decide we don’t want a video playlist instead what we’re going to add is an image carousel.
First we need to delete our video playlist and we do this by right clicking on the pencil and clicking on delete. I’m now going to quickly scroll down the page and drag and drop in our image carousel and I’m going to drop this underneath the buttons where our video playlist was. Once it’s in place we can start adding our images that we want to display in our carousel. Select and highlight all the images that you want to be displayed in your carousel.
Once they’re added click on insert gallery. Now these don’t have to be thumbnails I’m just using these as an example. You could have pictures of you your cat your dog whatever you like. If you’re also selling items online this could be pictures of your merchandise. Now as you can see the images look cropped on the page. This is easily fixed all you need to do is click on the drop down menu next to image size on the left hand side and select full. As you can see by clicking on the arrows on the carousel.
We can flick through our images. Like all elemental widgets we can customize it by clicking on style in the top row on the left hand side. We have the ability to change the size and colour of our arrows. We can also change the colour of the dots on the bottom of the page along with their size. Now I am struggling to think of things to show you and that’s because every single widget on Elementor can be used on this page.
So the possibilities of how it looks and what you can add are almost limitless.
One thing I can remember to show you is if you’ve got WP POOL dark mode you can use it on this page. If you’ve noticed the moon icon throughout the Page. Give it a click and it will take you into dark mode. if you haven’t seen WP POOL dark mode before there is a link HERE. You can also watch the video on how to use it.
The final thing left to show you is how to add a background image on your not Linktree page.
What you need to do is go to the top of the page and edit the section. Now click on the style tab and click on the classic button. Next to background type as you can see I’ve already got an image that pops up. The way I added that was by clicking on the choose image box on the left hand side. If I want to change that background image to something else click on choose image and select your new background. Just make sure it’s set to no repeat on the left hand side.
You do this by clicking in the drop down menu and selecting no repeat. You also want to make sure that your image fits the size of the screen. You do this by clicking on layout in the top left hand side of the screen. Now click on the drop down menu next to height and select fit to screen. That’s it for this Tutorial I hope you found it useful.
If i have inspired you to buy WP Pool dark mode or Elementor Pro then please do use the links. They are affiliate links they don’t cost you any more to use but they do give me a very small percentage of their profits if you choose to buy.
If you do have any questions please do come and hit me up in the comments box below please remember to like and subscribe.
I’ll see you in the next Tutorials thanks for reading.
