Setting Up ActiveCampaign Forms (Beginners Tutorial 2022)
Hi guys in this Tutorial I’m going to show you how to design and integrate ActiveCampaign forms into your website. There are four different types of forms you can choose from. I’m going to show you each one individually. Don’t forget to like and subscribe for future Tutorials let’s get into it.
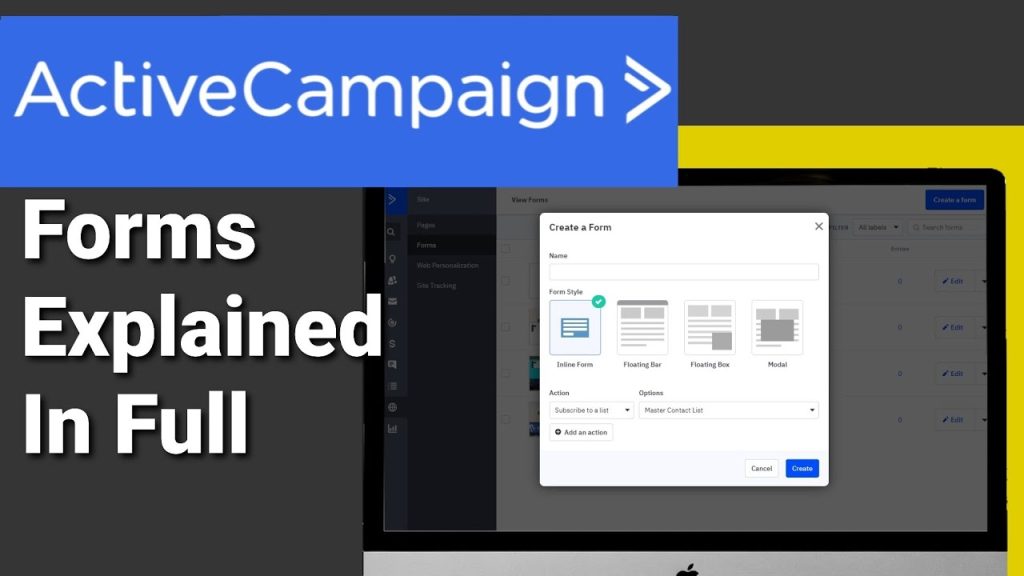
Okay guys so the first thing you’re gonna need to do is click on site on the left hand side and go up to forms. Click on create a new form and because we’re creating an inline form all we need to do is type in our name. Click create again and wait for the page to load. Now that the page is loaded you’ll see a preview in the main screen of what your form will look like and on the right hand side.
You’ll see all the different widgets you can add to that form. All you need to do is start dragging and dropping the widgets where you want them. I’m going to select an image and drag that into the page by clicking on the image box. It will bring up a small menu at the top. This is where you can add your image on the left hand side.
You can click on new image from here. You can select a picture that you’ve previously uploaded or you can click on add file on the top right. I’m going to select this one here. So all I need to do is click select image and it puts it onto our form. This obviously doesn’t have to be a big picture like this one is. It could be your company logo. To change the position of any of your widgets.
All you need to do is click on the cross next to them and drag them into their new position. Next on our form I’m going to add another header to the top to change the text in the header. Give it a click and on the right hand side it will bring up a small window. That you can start typing in once you’ve finished entering your text. All you need to do is click on the main page and start adding more widgets.
Once you’ve finished adding all the widgets to your form. You can start now thinking about what colours you want to use for your background and your text and buttons. To start changing our colours all we need to do is click on style on the top right hand side of the screen. The first thing we’re going to do is select the colour of our background by clicking on the colour picker on the right hand side.
You can pretty much select any colour you want and if you don’t want a background colour. You can always click on the make transparent button meaning your form will sit seamlessly onto your web page. What I did forget to mention is you can also change the layout of your form by clicking here. As you will see the form is landscaping style with the fields running from left to right on the bottom of the form.
I am going to change it back to how we originally had it and continue editing our colours. So the next one we’re going to change is our font and if you click on the colour picker again and slide it up you can see we can change our text to red and we can change it back again. Underneath that we can change our border and again just click on the colour picker and slide it around.
You will have to change the border size to at least one to see the difference. Next we’re going to change our font style and as you can see all you need to do is click on the drop down and select the one you want. Now we’re going to change our forms corner radius. The higher the number here the rounder the corners will be underneath. That is our forms maximum width moving down the page on the right hand side. We’re going to change our button colours.
Like the rest of the settings is as simple as clicking on the colour picker and choosing from the palette which colour you want your background to be underneath. That you can change the colour of your text. I’m going to change this to black as it’s easier to see against the green background and if I scroll down on the main page. You can see what I mean moving down the list. We can add a border to our button just by clicking the up button and adjusting the size.
If you want to change the style of the border then click on the drop down menu and select which one you want. Moving down on the right hand side. Again we can change our border radius again the higher the number the rounder the corners. Finally is our padding which makes the button bigger on the page. If you have any custom CSS coding that you want to add to your button.
All you do is drop it into this box. Lastly at the bottom of the page is the remove the ActiveCampaign logos toggle moving up to the top of the page. We’re going to click on options. The first thing you’ll see is on submit and this is where you decide what happens when your customers complete and submit your form. The first option you have is to show a thank you message the message can be customized.
All you need to do is type in a large box. If you don’t want to display a message you can always divert people to other pages. So if this form is embedded into an email you can have the customer diverted to your home page from the email. Once they’ve completed the form moving down the list is your from action. This is where you can set people onto mailing lists to the right of that you can change your opt-in options.
This is also where you can set whether the person submitting your form receives an email into their inbox. Once you’ve configured all these options. All you left to do is click on the save button in the bottom right hand side of the screen. If you want to go and change the name of your form. All you need to do is click on the box in the top middle of your page.
If you want to add email automations. All you need to do is click on trigger automation on the top right. If you want to see how to use trigger automations Tutorials Page. Now what we’re going to do now is go back to our main form and click on the integrate button on the top right hand side of the screen. As you can see ActiveCampaign have generated embed codes.
You can also use the clickable link the WordPress plugin feature which you will have to download or you can integrate the form into a Facebook page. I’m going to use a simple embed code for this integration. All you need to do is select the code right click and copy it. Now we’re going to head over to our page builder. I’m using Elementor but you can use any page builder that allows embed codes to add our form to the page.
I’m going to type in the search box shortcode. All I need to do is drag this widget into our page on the right hand side. It’ll bring up a box you can paste your code into. Give it a second to load and it will display your form. all that’s left to do is click on the green update button on the bottom left of the screen.
If you do want to see what your form looks like on your website then click on the preview box. Just next to the update button. Now all that’s left to do is scroll down to the bottom of our page and see our live ActiveCampaign form. Don’t forget to go back into ActiveCampaign and save and exit your form by clicking on the top right hand side.
Please don’t forget if you are finding this Tutorial useful then hit that like and subscribe button. The next form I’m going to show you is ActiveCampaigns floating bar. The first thing you’re going to need to do is type in your forms name and then go down and enter your website URL
Once completed you can change which list your customers are added to and you can add an action. All that’s left to do is click on create on the right. Once your page is loaded you’ll notice your website has loaded and on the top row you’ll see the form on the right hand side. You’ll notice that the style tab is open. The first option you can change is the background colour.
All you need to do is open the colour picker and select which colour it is you want to choose. Moving down slightly we can change the colour of our font that is displayed in the float in bar. Finally in this top section we can change the style of our font by just clicking on the drop down menu.
Moving down again you can change your button colour and as you can see it’s as easy as clicking on the colour picker and selecting through the palette. Next we’re going to change the colour of our font displayed in our text button. Underneath that we can add a border to our button and we can change the style of it by clicking on the drop down menu.
If you want to change how round the corners are of your button. Then all you need to do is click on the up and down keys on corner radius. If you want to change the size of the button then all you need to do is click on the up and down key on the button padding.
The next section allows you to add custom CSS to your floating bar. Finally at the bottom of the list there is the toggle to remove the ActiveCampaign branding once switched off. As you can see in the top left hand side where the floating bar is the icon for ActiveCampaign has been removed.
I’m now going to move on to the options tab at the top of the page. The first thing I’m going to show you is the initial effect. This is how your floating bar will load on the page. By clicking on the drop down menu you can either select slide in fade in or no effect at all.
If you want to preview the animation then all you need to do is select one of the options underneath the effect box. You can choose whether there’s a delay on the entry you can choose either none or on scroll. If you select on scroll it’ll ask you how much of the page you want to be displayed before it takes effect. To change the location of the bar from top to bottom then select on the position tab and select bottom.
As you can see it moves it to the bottom of the page with the animation and to change it back. Just click top next on the list is the visibility section here. You can change how often people see your floating bar by clicking on the drop down menu. You have the choice to hide after the first interaction show once and then hide or never hide. All these are fairly self-explanatory.
If you do choose hide after interaction you will be asked how many days you want to hide the bar for until it’s displayed to that user. Again moving on now we’re going to click on fields. In here we can choose which information we want from our subscribers. All we have to do is switch on or off our toggles to make sure we are collecting the right information from our subscriber.
All we need to do is click on the required box. Almost to the end we’re going to scroll down to submit by clicking on the drop down menu. You can either send a thank you message or send your subscriber to a new URL. All you need to do is start typing in your new message or if you chose to divert them to a new page type in your URL moving down the game. We’re going to go to the from action. In here we can choose which mailing lists our subscribers are added to.
Finally at the bottom there is the advanced box. By leaving this on it will allow subscribers to overwrite their information with blank fields. That’s all the sections covered in this form. All that’s left to do is integrate it into our website. To do that we need to click on the blue integrate button on the top right hand side of the screen. Once clicked you will be generated a shortcode that you can add to your website.
Copy the code and head over to your page builder. For this example I’m using Elementor in the search bar. start typing in shortcode and drag it into your page builder. Now on the left hand side all you need to do is paste in your shortcode where you’ll see it slide in from the top.
If you’re happy with the results click update at the bottom and preview your page. Once my page is loaded I’m going to scroll down and after 20% of my page has been displayed. It will appear don’t forget to go back to ActiveCampaign and click save and exit in the top corner.
It’s also a perfect time to say.
If you are enjoying the Tutorial so far then please do hit the like and subscribe button.
In this next section we’re going to cover ActiveCampaigns floating box. The first thing you’re going to need to do is enter a full name. Once you have finished typing in the full name you’re going to have to go down and enter your website URL. Underneath that you can choose which list your subscriber is added to.
Then all you need to do is click on create. Once the page is loaded you’ll have a preview of your form at the very top. You can change the style and layout of the form. Underneath that we can start changing our box colours by clicking on the colour picker. You can slide around and select a colour that you want for your form. You also have the ability to add a background image.
To change the colour of the text click on the font colour picker. Again all you need to do is click and slide around the colour palette below the font colour picker. You can choose which style of font you want for your form. All you need to do is click on the drop down menu and select which font. Next we’re going to change the width of our form. All we need to do is click on the up and down buttons to change the size and width of the form.
If you’re looking to change the padding size all you need to do is follow the same process. You can either type straight into the box or you can click on the up and down buttons to change the roundness of your corners. All you need to do is type into the box in corner radius. I’m going to type in 20% here and what you should notice is the corners of the form are slightly rounder.
Next on the list is your form shadow. you can change this and increase it by clicking on the drop down menu and selecting heavy. The next section on the right hand side is inputs. This is the area where your customers fill in their information. As you can see the lettering in the input boxes is red and if I slide it across it will change it to black.
If I want to change the background colour then all i need to do is click on the colour picker. Again underneath the colour pickers you can change the corner radius of the input boxes to round off the corners. All you need to do is click on either the up or down button and you can type in a higher number. Moving down again now we’re going to change our button colours as you can see ActiveCampaign have made. It really easy with colour pickers. You really can customize each element on this form.
If you want to add a border to the button all you need to do is go to border and increase the number. You’re then given the option to change the border style so you can choose from dotted solid double or dashed. If you choose doubled you will have to increase the size of the border to at least four before it takes effect. If you want to round off the edges of the button then all you need to do is increase the number on the border radius.
You can do this by typing into the box or you can click on the up and down buttons. If you want to increase the size of the button all you need to do is increase the number in padding. Moving down again you can add custom CSS code in all you need to do is paste it into the box. if you want to remove the ActiveCampaign branding then just click on the toggle on the bottom.
Now we’re going to go to the top of the page and click on options. If we scroll to the top of the page the first option we’ve got is box settings. The first thing you can change is the form entrance animation by clicking on the drop down menu. You can choose whether to slide in fade in or no animation at all. When you select one of the options it does give you a preview of the animation.
If you want a slight delay in the loading of the box then. All you need to do is click on show delay it’ll give you a drop down option that will show you how much of the page that you want to be displayed before the form loads. If you want to change which side of the screen the box sits on. All you need to do is click on the drop down menu and you can change it from left to right.
Moving down again now you can change the boxes visibility. You can choose whether to hide after interaction show once and then hide or never hide. Moving down again on the right hand side. We’ve got fields as you can see you can make boxes mandatory. You can choose whether to collect people’s phone numbers when they subscribe. When people do subscribe you can send them a thank you message or divert them to a URL.
Whichever you choose all you need to do is start typing into the box underneath. As you can see in the bottom left of the screen you do have a preview window of your message. Moving down again we can choose which list our ActiveCampaign subscriber is added to. Finally on the right hand side is advanced. This is where you can choose if blank fields overwrite previous information.
One thing i have almost forgot to show you is that you can change the picture in your form. To change the envelope on our form. All we need to do is click on it and it’ll load our ActiveCampaign gallery. In here we can select something like our company logo. To upload a file into your gallery click on add file in the top right hand side of the screen.
Once the file is uploaded click select image all that’s left to do is integrate our form into our website. To do this click on integrate in the top right hand side of the screen. ActiveCampaign will generate you a simple embed code that you can copy into your page builder. I’m going to select the code and head over to Elementor for some reason my video did cut out here so I have had to go back into ActiveCampaign and create a new form.
To embed your form onto your page you’ll need to drag in a short code widget. I’ve already done this so all I need to do is click in the box on the left hand side and paste in our short code. Give it a second to load and your form will be displayed on your page builder to make your form live. Click on the update button and to preview it click on the preview button next to the update button.
Once you’re on your live page you’ll see that the form loads in automatically. If you start to scroll down the screen your form will stick to its position. Don’t forget to go back over to ActiveCampaign and click on the save and exit button on the top right hand side of the screen. The final form I’m going to show you how to build is the modular form. So click on create in the top right hand side and select modular.
First you’ll need to type in your name of your form. Then you’ll need to enter the website URL that you want the form to be displayed onto. All that’s left to do is click on the create button on the right hand side. Once the page is loaded you have a preview window of your website with the form displayed on. You’ll also have the page builder on the right hand side to change the layout of your form.
Click on the four options you have on the top right hand side of the screen. To change the colour of your background select the colour picker. If you click and hold on the palette you will be able to change which colour you want your background to be. If you don’t want to choose a background colour you always have the option to choose a background image. All you have to do is click on the icon next to the palette.
This will allow you to add your image URL to change the colour of our font. Select on the colour picker and slide our cursor across the colour palette and to change the style of our font. All we need to do is click on the drop down menu and select which font we want to use. To change the width of the form click on the up or down button or you can type in your custom size to add padding to your form.
Either click on the up or down button or again click inside the box and type in your custom pad in size underneath padding. You can change your corner radius. All you have to do is click on the up and down button or you can type into the box the corner size. You want moving down again you can increase or decrease your shadow depending on which you want. All you have to do is click on the drop down menu.
Moving down to inputs we can change the background of our input box like all other sections. All you need to do is click on the colour picker and choose which colour you want on the palette moving down again. We can change the font colour of our input boxes like all other boxes we can change our corner radius. All we need to do is click on the up and down key or type into the box the corner radius is that we want. The next section is to change our button colours.
All we need to do is select on the colour picker and select the colour we want to choose on our colour palette like before. If we want to change the colour of our text in our button. All we need to do is click on the colour picker and choose it in our palette. To add a border onto our button all we need to do is click on the up and down button. You’re then given the option to choose the style of your border.
All you need to do is select it in the drop down menu underneath border style where you have your corner radius. Click on the up or down buttons or type into the box the size of the corners you want to make the button bigger or smaller. Click on the up or down button in padding moving down on the right you can add custom CSS coding. Finally at the bottom you can either add or remove the ActiveCampaign branding. Just click the toggle on or off.
Back up to the top right of our page we’re going to now click on options. The first thing we can change is our entrance animation. We can either choose fade in or none if we choose to fade in we then have the option to set a delay. This delay is a scroll delay and it will take effect after a certain amount of your page has been viewed.
Moving down we can change the forms visibility by clicking on the drop down menu. We can choose how often our visitors see the form next on the list. We can change which fields are displayed on our form. We can also make a mandatory by clicking on the required box. Next we can change our thank you message for when our visitors subscribe.
All you need to do is start typing in the large box. If you want to divert your subscriber to another page then all you need to do is click on the drop down menu and enter your page URL. If you want to change the list that your subscriber gets added to in ActiveCampaign. you can change them in this section here. If you want blank fields to overwrite information that’s previously been submitted then leave this box ticked here.
You can also add your company logo to your form to do this click on the envelope in the form and it will open the ActiveCampaign gallery. Click on the select image button all that’s left to do is integrate our form into our website. All we need to do is click on the integrate button in the top right hand side. We’ll then be generated an embed code that we need to copy and paste into our page builder.
I’m using Elementor for this example I’ve already dragged in a short code widget all that’s left to do is paste in our code on the left hand side. Click on the green publish or update button in the bottom left hand corner. To preview your live page click on the I next to the publish button. Remember to head back over to ActiveCampaign and click on the save and exit button in the top right hand corner.
If you have a form that you’ve previously designed and not yet published. Then all you need to do is click on the drop down menu on the right hand side here and click on integrate. This will generate your embed code and all you have to do is copy and paste it into your page builder. As you’ve seen me do in the rest of the video that’s it for this Tutorial.
I really do hope you found it useful and interesting if you’ve got any questions. Hit me up in the comments box below. If you’re thinking about signing up to ActiveCampaign. Then please do use the link in the top of the description it is an affiliate link it doesn’t cost you any more to use but it does give me a very small percentage of ActiveCampaigns profits if you choose to sign up.
Don’t forget to hit that like and subscribe button.
Thanks for watching and see you in the next Tutorial.