
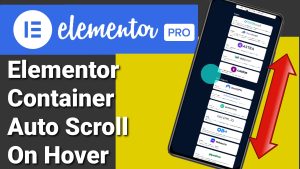
Portfolio Image Auto Scroll Effect Elementor FlexBox Containers
Portfolio Image Auto Scroll Effect Elementor FlexBox Containers
Hi guys, in this tutorial I’m going to show you how to auto scroll on hover using Elementor containers. I’ll also be showing you how to take full length screenshots of your website. It’s extremely easy to do, so sit back, relax, hit that like and subscribe button, and let’s get into the tutorial.
Adding a Container in Elementor
Okay, so the first thing we need to do is click on the pink plus icon in the middle of the screen and add our container, and I’m going to select the one with four sections. You can obviously select one that best suits your project.
Taking Full-Length Screenshots with GoFullPage
Now what I’m going to do is go to the first section and add a background image to it, and this background image is going to be a full length screenshot of our website, and to get that full length screenshot, I’m going to be using the Chrome extension GoFullPage. This is a free and simple extension for Chrome users that you can download onto your browser.
Using GoFullPage to Download Screenshots
So what I’m going to do now is head over to my website and take that full length screenshot once you have got GoFullPage installed onto your Chrome browser all you need to do is click on the jigsaw extension icon and select it within the extensions it will automatically scroll down your page and take the screenshots it will automatically arrange those screenshots into one image and all you need to do is click on the download button.
Setting Up Permissions for GoFullPage
If it is the first time you’re using the extension, you will need to allow permission for it to download and save onto your computer. If you want to see a full tutorial on how to use GoFullPage, there will be a link in the top right-hand-side of your screen.
Adding a Background Image in Elementor
Now that we’ve got our background image, we’re going to head back over to Elementor, and inside our first container, we’re going to right-click and select edit container. Now in the menu on the left-hand-side, we’re going to click on the style tab. Under background, we’re going to click on the pencil icon which says classic, which allowed an image box that we can upload our background to. Select choose image, and it will bring up your WordPress media library. From here, select your background image and click on select in the bottom right-hand-side of the screen. As you can see, our background image has been loaded into our first container, but it doesn’t quite fit.
Adjusting Background Image Display Settings
If it is the first time you’re using the extension you will need to allow permission for it to download and save onto your computer if you want to see a full tutorial on how to use go for page there will be a link in the top right hand side of your screen now that we’ve got our background image we’re going to head back over to Elementor and inside our first container we’re going to right click and select edit container now in the menu on the left hand side.
We’re going to click on the style tab under background we’re going to click on the pencil icon which says classic which allowed an image box that we can upload our background to select choose image and it will bring up your WordPress media library from here select your background image and click on select in the bottom right hand side of the screen as you can see our background image has been loaded into our first container but it doesn’t quite fit.
Adjusting Background Image Display Settings
We’re going to change that now, and the first thing we’re going to do on the left-hand-side is Select display size, and in the drop-down menu, select cover. Now what we need to do is go up to repeat and click on the drop-down menu, and this time we’re going to select no repeat. As you can see, our background image fits the width of our container, but obviously not the height, so we can start correcting this. We’re going to click on the plus button in the middle of our container.
Adding a Mobile Phone Border Image
What I’m going to do now is drag in an image widget from our menu, and the image I’m going to add is a border of a mobile phone, so I’m going to select it from our media library and click on select in the bottom right-hand-side of the screen. If you want to be able to use phone images like this one on your website, there is a link in the top right-hand-side to show you where you can get them from, and they are completely free to download and use on your website.
If you are finding this Tutorial useful so far, please do hit that like and subscribe button and notification Bell for future Tutorial. As you can see, our background image has stretched to the full height of our phone image, but it doesn’t quite fit inside the phone, and this is what we’re going to start to correct now.

Fine-Tuning Margins for Image Alignment
So what we need to do is click on the advanced tab in the top left-hand-side of our screen, and underneath where it says layout, it says margin, and this is what we’re going to have to change to make sure our background image fits within our mobile phone. What we first need to do is unlink our margins.
To do that, we need to click on the grey link icon next to where it says margins. Now it’s just a simple case of adjusting our margins to make sure our background image fits with inside our mobile phone image. This can be a little bit time-consuming, but you will also need to preview your page multiple times to make sure the final effect looks right.
Adding CSS for Auto Scroll on Hover
Now that our background image is in place, we’re going to add a CSS code that makes it scroll automatically on Hover. Remember, if you do want to add CSS code to your Elementor website, you will need Elementor Pro. There is a link there in the description below.
Copying CSS Code for Hover Effect
To find the hover effects CSS code, you’ll need to head over to my website, which you can find the link for in the description below. Scroll down to the bottom of the page, and you’ll see the CSS code that you can click on the copy button on the top right-hand-side of the box. Now you’re going to need to head back over to your Elementor web page builder, and what you’re going to need to do is click on the little grey box in the top left-hand-side of your container.
Applying Custom CSS in Elementor
This will allow you to edit your container, so you need to go into the advanced tab, scroll to the bottom, click on custom CSS, and paste in your CSS code. Once you’ve done that, we can collapse our menu and preview our page and make sure our code is working. To do that, all we need to do is hover over our image, and as you can see, it automatically Scrolls down, and when we stop hovering over our image, it Scrolls back up to the top.
Adjusting Scroll Speed in CSS
As this is scrolling slowed for me, I’m going to show you within the CSS code how to speed it up, so what we need to do is open our menu again, and as you’ll see within the CSS code, it says in out 4s. We’re going to change this from 4 to 2, and 2 lines down, it also says 4s, and we’re going to change this as well to two. Now if we hover over our image, you’ll see that it Scrolls up and down faster.
Checking Responsiveness for Tablet
Now that everything’s working on the desktop version, we’re going to check its responsiveness on a tablet. Within the tablet mode, we will need to go into the advanced Tab and start changing our margins to make sure our background fits our image. Remember that you will have to unlink the margins before you start making any more changes, otherwise it will change the work we’ve already done on our desktop version.
Optimizing for Mobile Responsiveness
And finally, once we finish with our tablet version, we can go and click on the responsiveness for the mobile phone and start making the additional changes there.
Final Notes on Elementor Pro and Wrap-Up
So there you have it, that’s how you can add a scroll effect on hover within Elementor. Remember, if you do want to add CSS code within Elementor, you will need Elementor Pro. There is a link for this in the description below. It is an affiliate link; it doesn’t cost you any more to use, but it does give me a very small percentage of Elementor’s profits if you choose to sign up.
If you have found this Tutorial useful, please do hit that like and subscribe button, the notifications bell for future Tutorials, and if you’ve got any questions, feel free to drop them in the comments box below on my blog or come and find me on social media. All those links are listed in the description below. That’s it for this Tutorial.
Thanks for watching and I’ll see you in the next one.
