

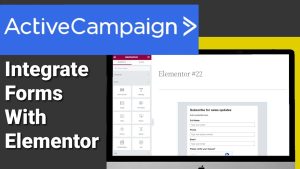
How To Integrate ActiveCampaign With WordPress
Hi guys in this blog I’m going to show you how to integrate your ActiveCampaigns form with your Elementor page builder. This process also works with WordPress and any other page builder that allows you to use embed codes.
Don’t forget to like and subscribe and hit the notifications for future blogs.
Hi guys the first thing you need to do is log into your ActiveCampaign account. Go to settings and developer where you can find your API key and your API URL.
Now you’re going to have to head over to your WordPress dashboard and go to plugins on the left hand side. Click add new and then you’re going to want to search for ActiveCampaign once you’ve finished typing it in push enter and once the page is loaded go to the first option here which is ActiveCampaign click on install and then activate.
Once the plugin is activated you will need to go to the left hand side and click on settings and scroll down to ActiveCampaign. What you’ll be asked to do now is copy and paste in your API key and your API URL. Now you need to go back into your ActiveCampaign dashboard and copy the URL key and paste it into the API URL box.
Integrate ActiveCampaign
You will have to repeat this process with the ActiveCampaign key so click on the copy button and drop it into the API key box. Once you’re done click on the update settings button. Now you need to go back over to ActiveCampaign and create a form. You do this by clicking on sites on the left hand side and clicking on forms.
You’ll then get a pop-up that says create a form just give it a click and wait for the page to load. I’m only going to create a very basic form today, so I am going to select the first option which is inline forms. These are static forms that don’t move on the page and are not overly intrusive.
The other three options are floating bar which sits at the top of the page a floating box that sits at the side and model. This sits in the middle of the screen.
To see how to build and use the other forms then make sure to check out my other blogs.
Back to our form that we’re building. Now all you need to do is add a name for that form. Once added click the create button on the bottom right. Give it a couple of seconds for the form building page to load and once it has you’ll notice on the right hand side you’ve got widgets that you can drag and drop into your form.
Once you have finished adding all the widgets that you want to add to your form you can style it by clicking on style on the right hand side. In here you can change the colour of your form with a colour picker you can also change the colour of your text backgrounds and change the sizes of your font.
You can also add custom CSS if you scroll slightly down on the right hand side.
What I’m going to do now is add this form to our website. all you simply need to do is click on integrate on the top right hand side of the screen. You’re then going to be generated an embed code that you can drop into your website. You can also generate this code as a link to add to emails and generate a code for Facebook.
As I’m going to be adding this form to Elementor page builder I’m going to copy the simple embed code. What I’m going to do now is go back over to our WordPress dashboard. Click on pages and click on one of the pages and edit with Elementor. Once Elementor has finished loading on the left hand side search for shortcode then all you need to do is drag and drop the shortcode widget to whereabouts you want to place it on your website.
Now on the left hand side you will need to paste in your active campaign shortcode. Once the widget is loaded all that’s left to do is click on publish, then to view your page just click on have a look.
This will then load the page that you’ve just edited with the form attached if you don’t want your form to say subscribe for email updates. You can always change this whilst building the form whilst in the form builder.
You can click on any section that you want to change the text to on the right hand side. You’ll notice it says HTML code. This is where you can edit your text all that you need to do is highlight the words that you want to replace and start typing. Make sure to correct and check for any spelling mistakes like I’ve made here. You can also change any of the headers for the widgets by following the same process. You can also add people to your automations list to do this all you need to do is click on trigger automations.
Once the page is loaded you can start mapping out your automation process if you’d like to see how to do this then check out the my other blogs.
If I have inspired you to use ActiveCampaign or Elementor then please do check out the link in the below it is an affiliate link it doesn’t cost you any more to use but it does give me a very small percentage of their profits if you choose to buy.
Thanks for watching and don’t forget to like and subscribe.
See you in the next blog

Integrate ActiveCampaign